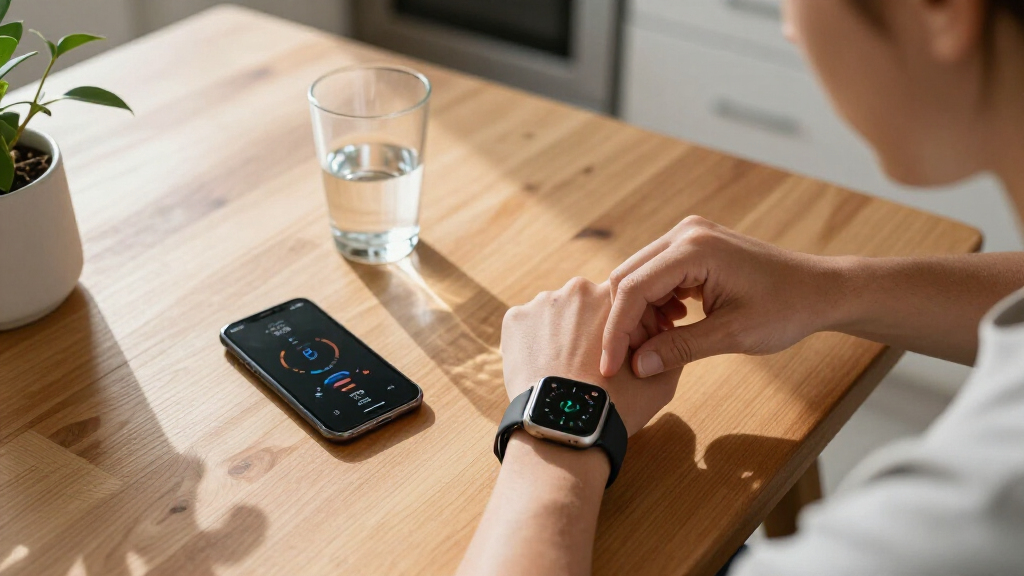

This guide helps you choose and set up a personal wellness tracking device, such as a smartwatch, fitness band, smart scale, or blood pressure monitor. You will configure the device and its app, check that data syncs, and establish a simple routine for reviewing measurements. It is for beginners who want to track general wellness, activity, sleep, or selected measurements without treating device readings as a diagnosis. Allow 30-60 minutes for setup; daily use usually takes a few minutes.

Get health and wellness essentials delivered free — and shop member deals
- Fast, free delivery on millions of items
- Access to Prime Big Deal Days deals on October 6–7
- Prime Video, Amazon Music and more included

QKBCQI Smart Ring with Health Tracking and Charging Case
- ✔ Health tracking: Heart rate, SpO2, HRV, stress, and sleep
- ✔ Activity tracking: Steps, calories, distance, and workout duration
- ✔ Sport modes: Swimming, walking, running, cycling, yoga, and hiking

Realalt 3DTriSport 3D Walking Pedometer with Clip and Strap
- ✔ Tracking: Steps, distance, calories burned, and exercise time
- ✔ Sensor: 3-axis sensor
- ✔ Display: Large, easy-to-read screen
Difficulty: Beginner | Time: 30-60 minutes for setup, then a few minutes daily
What You’ll Need
Tools & Materials:
- The wellness device, its charger, and any supplied accessories
- A compatible smartphone or tablet if the device uses an app
- A reliable Wi-Fi or mobile data connection for setup and syncing
- The device manual or manufacturer support page
Knowledge:
- Basic ability to install an app and adjust phone settings
- Access to an email address if account registration is required
- Awareness that consumer wellness readings may be estimates and are not a medical diagnosis
Check the device’s supported phone models, operating system, and measurement range before setup. If you have a medical condition, use a prescribed monitor or follow your clinician’s instructions rather than substituting a consumer wearable. Do not stop or change medication based on a wellness tracker reading.
QKBCQI Smart Ring with Health Tracking and Charging Case
The QKBCQI Smart Ring is the more comprehensive option in this two-device lineup. It tracks heart rate, SpO2, HRV, stress, sleep, and activity, giving us a wider view of daily patterns than the Realalt’s step-and-exercise focus. Multiple sport modes cover activities such as walking, running, cycling, yoga, hiking, and swimming, so the ring is better suited to someone who wants one small wearable to follow several parts of a routine. Its companion app works with compatible iOS and Android devices, and the listed app features do not require a subscription.That breadth comes with more setup and upkeep. We need to follow the official size chart carefully, since a ring that does not fit properly may be uncomfortable and less practical to wear consistently. The device is rated IP68, including a stated immersion rating, which makes it more versatile around water than a basic clip-on pedometer; however, water resistance should not be read as permission to ignore care instructions. The included 400 mAh charging case can provide additional charges, but the listed battery life is up to five days of standby, not active-use runtime. That distinction matters for anyone planning charging around continuous tracking.Compared with the Realalt, this is the stronger choice when wellness context and app-based tracking matter more than a simple screen. The Realalt, by contrast, avoids phone pairing and charging routines, and makes basic movement data easier to read immediately. Choose the QKBCQI if we will use its broader metrics and are comfortable with sizing and charging; skip it if all we need is an uncomplicated step count or if ring sizing feels like a hassle.
Pros:
- Tracks health, sleep, and activity metrics in one ring
- Charging case provides additional charges
- No subscription fee for app features
- IP68 rating and multiple sport modes support varied routines
Cons:
- Requires careful sizing with the official size chart
- Up to five days is specified as standby time, not active-use battery life
- A compatible smartphone is needed to use the companion app
Best for: People who want a discreet wearable for sleep, health, and activity tracking through a compatible phone app.
Not ideal for: Buyers who want a large built-in display, dislike charging or ring sizing, or only need a basic step counter.
Bottom line: The QKBCQI is our leading pick for buyers who will use its broader wellness metrics and accept the sizing and charging tradeoffs.
“The QKBCQI is our leading pick for buyers who will use its broader wellness metrics and accept the sizing and charging tradeoffs.”
Realalt 3DTriSport 3D Walking Pedometer with Clip and Strap
The Realalt 3DTriSport is a practical counter for buyers who want movement data without a connected-device routine. Its 3-axis sensor tracks steps, distance, calories, and exercise time, while the large display lets us check those basics directly on the device. That makes it a more approachable starting point than the QKBCQI ring for someone who wants visible feedback without opening an app, managing a wearable size, or interpreting a collection of wellness metrics.Its strongest distinction is low-maintenance operation. The pedometer uses a replaceable CR2032 battery listed for up to 12 months, and it stores up to 30 days of activity records. There is no Bluetooth or smartphone connection to configure. The clip and neck lanyard offer different ways to carry it, and the included mini screwdriver supports battery replacement. For a walking routine, these choices reduce friction: we can put it on, view the screen, and focus on daily movement.But simplicity also sets a firm ceiling. Unlike the QKBCQI, the Realalt does not track sleep, heart rate, SpO2, HRV, or stress, and it cannot provide wireless syncing or app-based analysis. Its calorie and distance figures are activity estimates, not a complete picture of personal wellness. The battery is also non-rechargeable, so it must eventually be replaced manually. We would choose it over the ring when a clear display and minimal setup are the priorities; we would not choose it for connected progress tracking or a broader health overview.
Pros:
- Large display makes core activity data easy to check
- No Bluetooth or smartphone connection is required
- Up to 12 months of listed battery life
- Clip and lanyard support different carrying preferences
Cons:
- Does not track sleep or health signals such as heart rate and HRV
- No wireless syncing or app integration
- CR2032 battery is non-rechargeable and must be replaced manually
Best for: Walkers, beginners, and people who prefer a readable standalone device without Bluetooth or smartphone setup.
Not ideal for: Buyers seeking sleep or health metrics, automatic phone syncing, or detailed analysis of activity trends.
Bottom line: The Realalt is the better fit when we want dependable, visible movement basics without the connected features and upkeep of a smart ring.
“The Realalt is the better fit when we want dependable, visible movement basics without the connected features and upkeep of a smart ring.”
As an Amazon Associate we earn from qualifying purchases.
Before You Start
Charge the device and keep its manual nearby. Use a private, secure account password, and review what information the app collects before granting permissions. Only allow features you plan to use; some functions, such as notifications or location-based exercise maps, need extra access. If a reading causes symptoms or seems alarming, follow medical advice and contact a health professional rather than relying on the device alone.
Step-by-Step Instructions
Step 1: Choose the measurements you want to track
Write down one to three practical goals, such as recording daily steps, checking blood pressure at home, or observing sleep duration. Match each goal to a device that measures it directly. A wrist wearable may estimate activity and sleep; a smart scale records weight and related estimates; a validated home blood pressure monitor measures blood pressure. Check independent validation or medical-device status where relevant, and confirm that the device’s measurement range fits your needs.
Tip: Do not buy a device based only on the number of features. A device that you can wear, charge, and use comfortably is more likely to produce a useful record.
Check: You can name the measurement you want and explain how the selected device records it.
Step 2: Install the official app and check compatibility
Find the companion app through the device maker’s official website or the Apple App Store or Google Play Store. Check the publisher name before installing, then confirm that your phone’s operating system is supported. Open the app and read its privacy and data-sharing settings before entering personal information. Avoid unofficial apps that request your tracker login.
Tip: If you do not have a compatible phone, check whether the device can store readings on its own or sync through a supported computer before relying on it.
Check: The official app opens on your device, and you have confirmed that your phone is supported.
Step 3: Create an account and set privacy controls
Create an account if the app requires one, using a unique password. Enter accurate profile details only when they are needed for the functions you plan to use; age, height, and weight can affect some estimates. Review choices for cloud storage, research sharing, advertising, and sharing data with other apps. Decline optional permissions that are not needed, and turn on a screen lock or account security feature where available.
Tip: Read whether deleting the app also deletes stored data. If you want a copy of your records, check the app’s export options before setup is complete.
Check: You can sign in, identify the app’s main privacy choices, and have limited permissions to the features you need.
Step 4: Pair and configure the device
Turn on Bluetooth or Wi-Fi if the manual requires it, then follow the app’s pairing instructions. Select the exact device model when prompted. Set the correct units, time zone, and measurement preferences. For a wearable, adjust the band so the sensor sits in the position recommended by the maker: secure enough for contact, but not painfully tight. For a scale or cuff, place and fit it as instructed in the manual.
Tip: Pair through the companion app unless the manual specifically directs you to use the phone’s Bluetooth menu. Pairing by a different route can leave the app unable to sync.
Check: The app shows the device as connected and displays the correct time, units, or model.
Step 5: Set a realistic tracking routine
Choose when and where you will take each measurement. Wear an activity tracker during the periods you want to compare, and charge it at a consistent time that does not interrupt the data you care about. For blood pressure, follow the monitor’s instructions about posture, rest, and cuff placement; take readings at the times recommended by your clinician or device guidance. For weight, use the same scale on a firm, level surface and measure under similar conditions.
Tip: Start with one or two measurements. Extra alerts and daily targets can become distracting; add them only if they support your goal.
Check: You have a repeatable time and method for collecting each measurement.
Step 6: Take a test reading and check the fit
Record one test measurement using the device’s instructions. For a wearable, confirm that the sensor is against the skin and that the band remains comfortable during normal movement. For a scale or blood pressure monitor, follow the required stance, rest period, and positioning. Compare the result with the device’s display or app, not with a different device taken under different conditions.
Tip: Do not tighten a wearable until it hurts or place a cuff over clothing unless the manual explicitly allows it. Incorrect fit can affect readings.
Check: The device produces a reading without an error message, and the displayed value appears in the app or device history.
Step 7: Confirm syncing and review the record
Open the app after the test reading and look for a timestamped entry. If the data has not appeared, keep the device near the phone, open the app, and wait for the sync to finish. Check that the date, time, units, and measurement type are correct. If the app offers export or backup settings, decide whether to use them and where the file will be stored.
Tip: A tracker may store data temporarily and sync later. Check the manual for its storage limit so you know how long it can go without connecting.
Check: The test reading appears once in the correct section with a plausible timestamp and the units you selected.
Step 8: Review trends without treating estimates as diagnoses
Use the device consistently for several days before drawing conclusions about patterns. Look for changes over time, not a single isolated number, and note factors such as exercise, sleep, stress, illness, or measurement conditions. Treat calorie, sleep-stage, oxygen, and similar estimates as approximate unless the maker provides a validated measurement method. Discuss persistent concerns or symptoms with a qualified health professional.
Tip: Do not change medication, diet, or treatment based solely on an app alert or consumer-device estimate.
Check: You can find a history or trend view and explain what it measures, including its limitations.
Common Mistakes to Avoid
- Choosing a device that does not measure the intended health metric directly. — Check the product specifications and validation information for the exact measurement before purchase; a general wearable may estimate a value rather than measure it.
- Wearing or positioning the device incorrectly. — Follow the maker’s instructions for sensor placement, cuff fit, posture, and surface. Recheck fit if readings are missing or inconsistent.
- Expecting an app to sync while Bluetooth, Wi-Fi, or permissions are disabled. — Allow the connection required for syncing, keep the device within range during setup, and check the app’s connection status.
- Reacting to one unusual reading as if it were a diagnosis. — Repeat the measurement according to the manual, note the conditions, and seek clinical advice for ongoing concerns or symptoms.
Troubleshooting
Problem: The app cannot find or pair with the device.
Solution: Charge and restart the device, turn on the connection method named in the manual, and keep it close to the phone. Check that it is not paired to another phone. Follow the app’s pairing process again; remove an old pairing only if the manual recommends it.
Problem: Readings do not appear in the app.
Solution: Open the app, confirm the device is connected, and wait near it for syncing. Check Bluetooth or Wi-Fi access, background app permissions, and the device’s storage or sync instructions. Restart both devices if the connection remains stuck.
Problem: Readings are missing or vary sharply between attempts.
Solution: Check fit, placement, movement, and the conditions specified by the manual. Repeat the measurement after correcting technique. For a medical measurement, use a validated monitor and ask a clinician or pharmacist to check your technique if results remain inconsistent.
Problem: The app shows the wrong units, time, or date.
Solution: Check the device and phone time zone, then open the app settings and select the intended units. Sync again and inspect the timestamp. Contact the manufacturer if old records remain incorrectly labeled.
What Success Looks Like
Your setup is working when the device is connected, configured with the correct profile and units, and records a test measurement that appears in the app or device history with a sensible timestamp. The device should fit or sit as directed, the routine should be practical to repeat, and you should know where to find privacy settings and data history. A successful setup does not mean every reading is medically accurate; use appropriate clinical equipment and professional advice for health decisions.
Next Steps
Use the device according to your routine and charge or clean it as directed by the maker. Check the app periodically for software updates, privacy changes, and storage limits. Review trends at a consistent interval rather than repeatedly checking every alert. If the device is used to support care, ask your clinician which readings to record and how to share them securely. Stop using the device and contact the maker if it causes skin irritation, gives repeated errors, or appears damaged.
Frequently Asked Questions
How long should I use a tracker before looking for trends?
Collect readings consistently for several days or longer, depending on the metric and the device’s guidance. A longer record can make ordinary day-to-day variation easier to distinguish from a pattern. Follow a clinician’s schedule when tracking a medical measurement.
Can a smartwatch replace a medical monitor?
Not automatically. A smartwatch may estimate some measurements and may not be validated for diagnosis or treatment decisions. Use a medical device recommended for the measurement and ask a health professional which device and method suit your needs.
What should I do if a reading seems alarming?
Check that you used the device correctly and repeat the measurement if the instructions call for it. If you have severe symptoms, seek urgent medical care. For repeated unusual readings without urgent symptoms, contact a health professional rather than relying on app guidance alone.
Do I need to share my data with other apps?
No. Share data only if you want a particular feature or health professional to receive it. Review the receiving app’s permissions and privacy policy, and revoke access if you no longer use that connection.
Halloween Picks
halloween
As an affiliate, we earn on qualifying purchases.